UPDATED KITCHEN FLOORING
When we first moved into our new house over a year ago, there was a laundry list of things that needed to be done ranging from purely cosmetic to completely necessary (ahem water leaking from the kitchen sink into the basement). BUT one of the major priorities, in my mind, was the kitchen flooring. The vinyl tile wasn’t terrible, BUT if you looked closer, you’d see that it was peeling in some places and bubbling up in others. And don’t get me started on the floor itself! It was like the rolling hills of Georgia in there. I think there was a 3 inch difference in height in some places. Pretty extreme, right?
The old floor was dark and I wanted a white floor to maximize the light in this space. After browsing around on HomeDepot.com, with so many great tile choices to choose from, I had a hard time choosing! I narrowed it down to three completely different white tiles. I was torn between a traditional herringbone pattern, a larger-scale hex tile and a picket-shaped tile. After posting a vote on Instagram, my readers helped me pick which tile to choose! In the end I went with the picket tiles because so many of you loved their unique shape!
BEFORE

It was easy to calculate the square footage of tile I needed by taking the room’s measurements and using Home Depot’s tile calculator. I placed the order online and had the tiles shipped directly to my house. The boxes arrived stacked on a pallet and ready to go. After picking up a few of those heavy tile boxes, I really came to appreciate the home shipping!
I chose a nice, neutral gray grout which is a nice mid-toned warm gray. It was the perfect amount of contrast with the white tile. I recommend doing a dry tile placement test before starting, so you can figure out where the tile will break at the beginning and end of your space. Especially in an old house like this one where the walls are never even. I also knew I wanted the tile to run long-ways with the length of the room to give the illusion that the space is longer than it actually is. It took a couple of different tile adjustments, but the prep-work was worth it.

We removed all of the appliances and all of the cabinet baseboards so that we could tile underneath them, which I highly recommend doing. It’s not something that you’ll notice so much now, but you’ll thank yourself later when it comes time to replace appliances, because they’ll never fit exactly the same!

Overall the whole project took about a week. Demo and removal of the previous flooring took a couple of days. Then there was leveling compound to get rid of the unevenness in the floor. After that dried, then the real fun began! Tile placement. That took 3 days and the grouting took another. Not bad for a week’s worth of work right?
AFTER


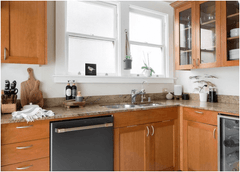
I know some of my readers were concerned that I chose white flooring for the kitchen, because it shows dirt easily. I really put a lot of consideration into that, but in the end, I decided I’m a-okay with it. You know why? Because then I can clean it up – instead of it sticking around and blending into the flooring. In my case the benefits out-weighed the consequences, because the way the light reflects on those white tiles and the warm wood of the cabinets really makes it all worth it!
Now for the rest of the kitchen! We’ll be changing everything but the cabinets, so there’s still lots to do. For now, I have my eye on some new cabinet hardware!
